Around this time every year, it’s like a kids cakes showcase here, thanks for my kids birthday! And I know I’ve said it before, but it’s true. It’s true that once you become a mother, you lose your mind. You will do all kinds of crazy things for your kids. I still remember how obsessive I used to be about my kids poop. It’s like I wake up starting to think about it, and I can’t go to sleep also because of it!
Making your kids happy is also one of the ultimate goals. And birthdays seem to be the top non-screwable item beyond everything else. This year, we threw our kids the very first birthday party with their friends. I made a monster cake to go with the Halloween theme. Fun!
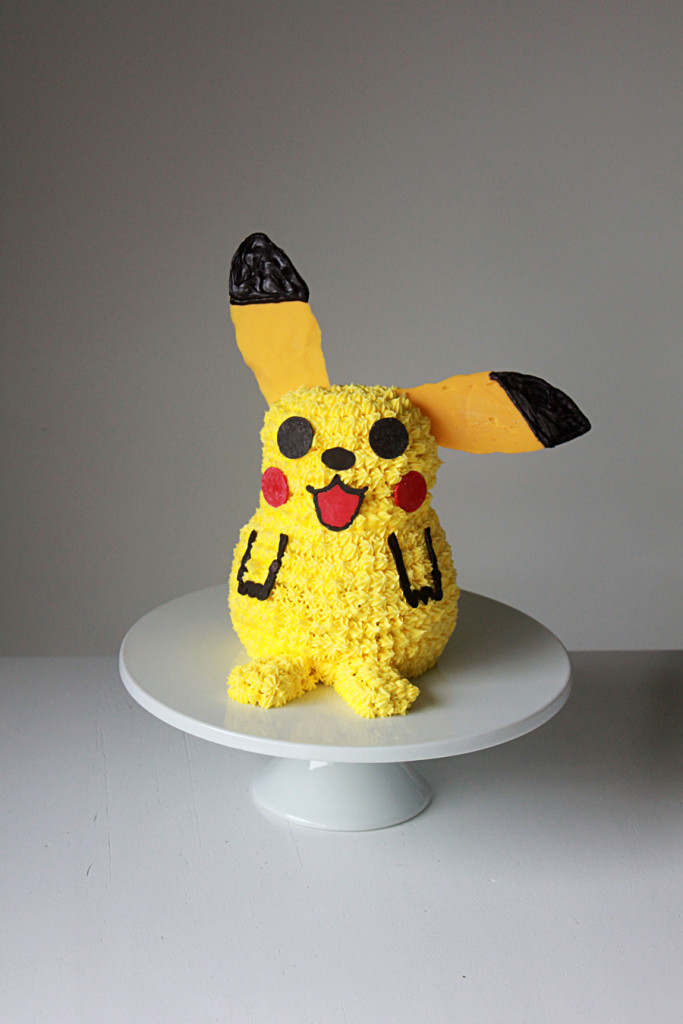
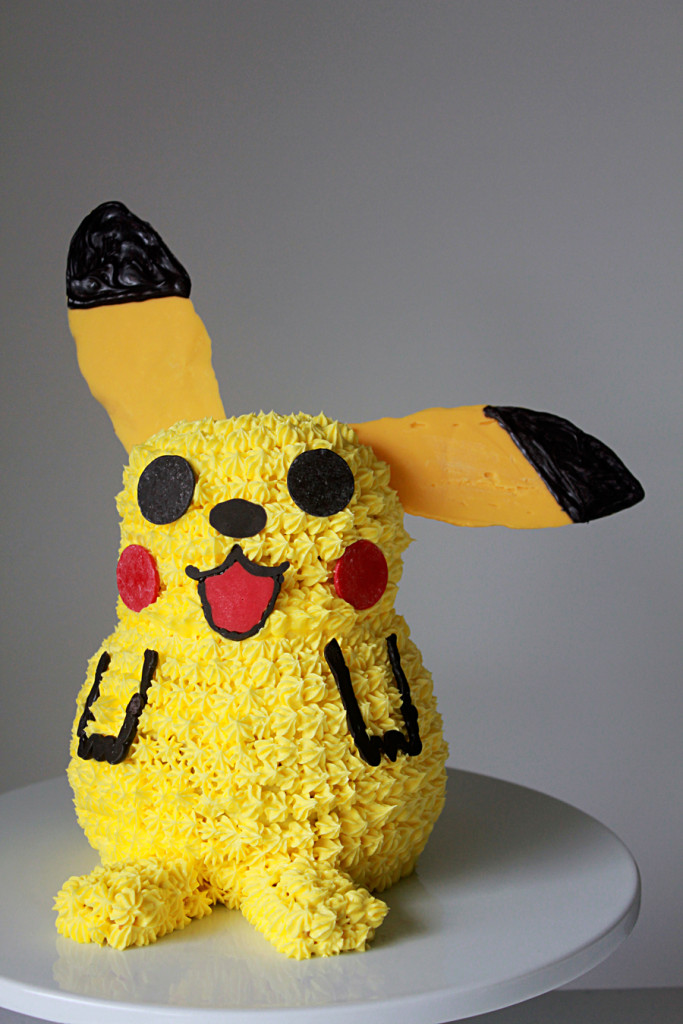
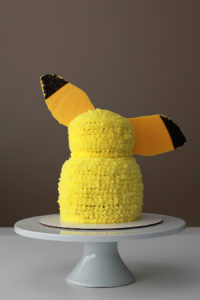
For our own family celebration, I made this Pikachu cake. My kids have become big fans of Pokemon. Well, maybe more for my older son. But my younger girl can definitely do a better impression of Pikachu.

Here are some step-by-step photos of how I came up with this Pikachu cake. In fact it also helps if you want to apply the same process to make an animal cake or stuffy cake.
Ingredients:
Vanilla Cake
1 3/4 cups all purpose flour
1 cup granulated sugar
1 teaspoon baking powder
1 teaspoon baking soda
1/2 teaspoon salt
1 cup buttermilk
1 large egg, room temperature
1/2 cup canola oil
1 tablespoon vanilla extract
1 tablespoon white wine vinegar
Vanilla Buttercream Frosting
2 sticks unsalted butter, soften
1 cups powdered sugar, sifted
1/2 tablespoon vanilla extract
2 tablespoons whole cream
2 to 3 drops of yellow food coloring paste
Decoration
10 discs of yellow Candy Melts
10 discs of black Candy Melts
5 discs of red Candy Melts
Directions:
Preheat oven to 350F. Grease and flour two 5-inch cake pans and two 4-inch cake pan.
In a large bowl, mix the flour, sugar, baking powder, baking soda and salt.
In a bowl of standing mixer with a paddle attachment, mix buttermilk, egg, oil, vanilla and vinegar on medium speed until well combined.
Reduce the speed to low and slowly add the dry ingredients. Mix until just incorporated.
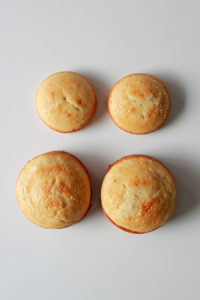
Pour about 1 1/2 cups batter each into the two 5-inch cake pans, and one cup batter into the two 4-inch cake pans.
Bake for 15 to 18 minutes or until wooden pick inserted in cake comes out clean. Cool in pan on wire rack for about 10 minutes before inverting on rack. Let cool completely.
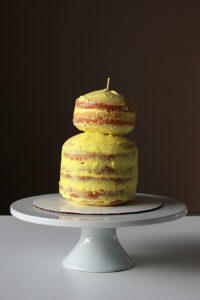
Use a small pairing knife to trim the top and bottom (if cake is too high) of each cake into a semi-sphere shape. (It will be easier if the cakes come up with round tops)
To prepare the frosting, beat butter for a few minutes with a mixer with the paddle attachment on medium speed. Add powdered sugar and turn your mixer on the lowest speed until the sugar has incorporated with the butter. Increase mixer speed to medium and add vanilla extract and cream. Then beat for another 3 minutes. Add color, one drop at a time, and continue mixing and adding color until it reaches the preferred color.
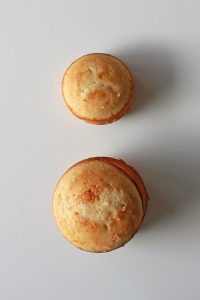
To assemble the cake, put a layer of buttercream on top of the flat side of each cake. Put two 5-inch cakes together with the bottom touching. Same as the two 4-inch cakes. Now you have two balls in different sizes.
Place the small cake ball (Pikachu head) on top of the big one (Pikachu body). Insert a wooden skewer or cake pop stick through the center to keep the layers secured.
Smear a thin layer of buttercream all over the cake to seal the crumbs. Chill in the refrigerator for 15 minutes.
Transfer the buttercream to a piping bag with a small star tip. Pipe yellow little stars all over the cake.
Place two discs of red candy melts and two discs of black candy melts on Pikachu face for its eyes and cheeks.
Outline Pikachu ears, nose, mouth and arms on a parchment paper.
Place black and red candy melts in different microwaveable Ziploc bags. Microwave on high for 20 to 30 seconds to completely melt the candy melts. Push the melted candy toward one corner of the bag. With a pair of scissors, snip off a very small opening.
Start piping the candy over the template, starting with the outline before filling inside.
Let dry completely before peeling off the parchment paper. Carefully place each part on the cake.
10 comments
This is the perfect cake for a special two year old little boy who specifically requested a Pikachu cake. Could you please tell me where you got the outline of Pikachu ears, nose, mouth and arm? Also, what did you do for the feet?
I am an experienced cake maker, but no NOTHING about Pikachu!
Thank you very much!
I just drew/outlined them by hand. For the feet, I placed two small cake rectangles with frosting. :)
Thank you, Fanny. Guess I’ll have to go on a search for Pikachu features!
Such an adorable cake!
WHAO!!!!!!!! I wish I discovered this sooner. So I might attempt to make this for my cousin who is a huge fan of Pikachu!!! It looks stunningly cute!
Thanks, Sally!!!! Maybe a surprise cake for her on Christmas! :)
Awwww……my girl loves Pikachu! I wish I had your talent to make this cake for her birthday. She would be thrilled!
Thanks for your kind words, Sandie! :)
Oh my god! Fanny!!!! That’s insanely cute! My son would love it! He’s a crazy fan too!
Thanks, Sabrina! :D