These cake pops are very easy to make. If you have already been making cake pops like myself, basically you are good to go. You can simply use white Candy Melts and you can have white skeleton, ghost or mummy cake pops. However, I was too forgetful to buy it and was too overwhelming with the other options that all the other colours could provide.

All it takes for these cute little treats is an edible marker. Make sure you buy one that works with candy coating. Typical edible marker tends to drag through or jab into the candy coating. If you write too hard, it will even break your cake pop.
Ingredients (about 45 pops):
Chocolate Cake
1 cup granulated sugar
3/4 cup plus 2 tablespoons all-purpose flour
1/4 cup plus 2 tablespoons unsweetened cocoa powder, sifted
3/4 teaspoon baking powder
3/4 teaspoon baking soda
1/2 teaspoon salt
1 large egg, room temperature
1/2 cup sour cream, room temperature
1/4 cup canola oil
1 tablespoon vanilla extract
1/2 cup boiling water
Chocolate Buttercream
1 stick unsalted butter, softened
1 cup powdered sugar, sifted
1/2 teaspoon vanilla extract
1 tablespoon heavy cream
1/4 cup unsweetened cocoa powder, sifted
Others
1 bag of dark chocolate Candy Melts
1 bag of orange Candy Melts
1 bag of lavender Candy Melts
1/2 bag of green Candy Melts
black candy decorating pen
Directions:
To prepare the cake, preheat oven to 350F. Grease and line an 8-inch square cake pan.
In a large bowl, mix together sugar, flour, cocoa powder, baking powder, baking soda and salt.
Crack in the egg, spoon in the sour cream, and pour in the oil and the vanilla. Mix with a wooden spoon until just combined.
Pour in the boiling water, and slowly mix until smooth and liquidy.
Pour batter in the prepared pan, and bake for 20 to 25 minutes. Transfer pan to a wire rack and let cake cool in pan for 15 minutes. Then invert it onto a greased rack. Let cool completely.
To prepare buttercream, beat butter for a few minutes in a standing mixer with the paddle attachment on medium speed. Add powdered sugar and turn the mixer on low, beat until the sugar incorporates with the butter. Add vanilla, heavy cream and cocoa powder, beat on medium speed for another 3 minutes, or until buttercream becomes light and fluffy.
To assemble cake pops, prepare two cookie sheets lined with parchment paper.
Break the cooled cake into a few big trunks by hand, place them into the bowl of an electric mixer fitted with the paddle attachment and mix on medium speed until the big pieces turn into crumbs.
Add frosting gradually into the cake crumbs and blend until the mixture becomes a dough, about 1 to 1 1/2 cups of frosting.
Use a small cookie scoop, roll dough into evenly sized balls and place them on the prepared cookie sheets. Refrigerate for 30 minutes.
Melt small amount of chocolate Candy Melts in the microwave gradually, 10 second intervals and stirring in-between. Dip one end of a lollipop stick in the chocolate and insert into the cake ball. Repeat until you are done with 15 cake pops. Refrigerate again for an hour.
Repeat with orange and lavender Candy Melts. So you will have three group of 15 cake pops in chocolate, orange and lavender.
Remove one group of cake pops from the refrigerator. Melt the corresponding Candy Melts in the microwave. Dip each cake pop in the Candy Melts and gently tap off excess. Place onto a piece of wax paper. Let it dry completely. Repeat with the remaining cake pops.
Repeat with the remaining two groups.
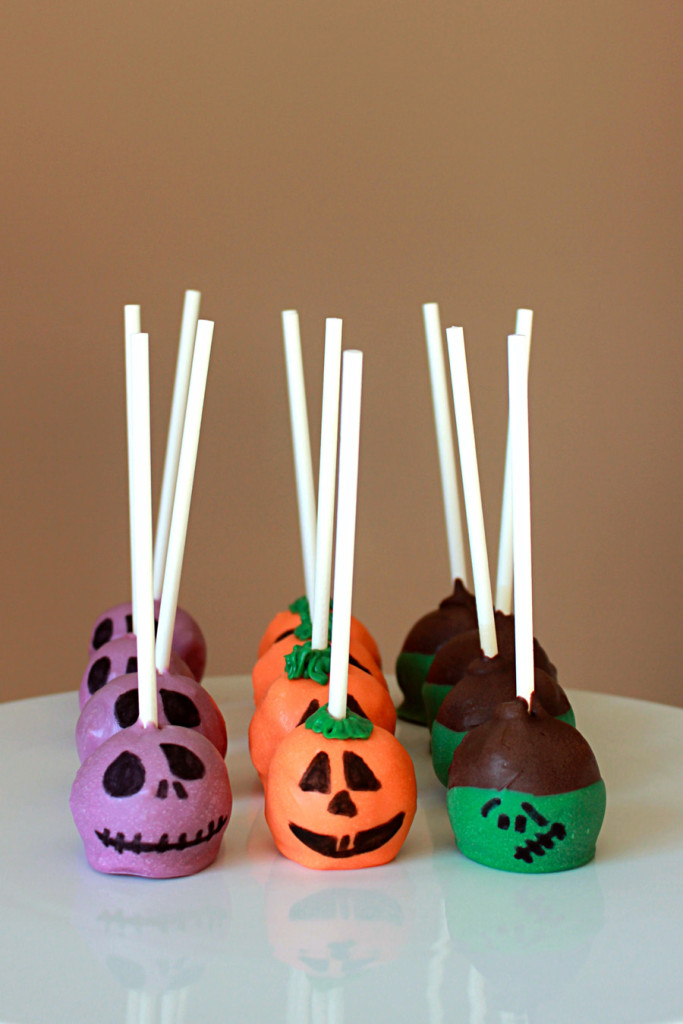
For the pumpkin, draw faces on the orange cake pops with an edible marker. Melt the green Candy Melts in the microwave. Transfer 2 to 3 tablespoons to a piping bag with a small round tip. Pipe the green Candy Melts on the pumpkin tops as leaves.
For the Frankensteins, dip each chocolate cake pop half way in the remaining green Candy Melts and gently tap excess. Place back to the wax paper and let dry completely. Draw faces on the green part.
For the purple skeletons, draw faces on the lavender cake pops with the edible marker.
5 comments
Thanks Fanny, I will try on some cookies this weekend. xo :)
Hi Fanny, Is the food marker really simple to use?? I am afraid of trying them. How thick should the candy melt coating be? Lots of questions, I did some cake balls for Valentine’s day, while they were cute and tasty, it was quite the process. Should have allotted MORE time. By the way, these are very cute and I would love to have had these at a party when I was a kid. xo :)
Shelly, the decorative marker looks like a writing marker, except what it writes is edible. So it’s pretty easy to use.
In terms of the thickness, I usually only do one one dipping/coating. I will do it twice if the coating is not smooth. :)
Very cute little treats!
Thanks, Joanna. :)